This article is a step by step guide to get started with and master your new TapXR.
If you do not yet have a TapXR, please bookmark these instructions for later.

1.Welcome & Overview
Congratulations on your new TapXR! We are so excited for you to get started and will be here every step of the way if you need any help. This comprehensive guide will walk you through everything you need to know about your amazing new device.
TapXR is a wrist-wearable keyboard, mouse and controller that pairs with any Bluetooth 4.0+ enabled device. It can be used to input text, play games, make music, control applications, navigate VR, learn new languages and more! It’s also fully customizable to add your own macros, languages, or even complex commands.
Tap is compatible with many operating systems including: iOS 9+, Android 5.0+, Windows 8.1+, OS X Yosemite+, and Linux Ubuntu; and many devices including phones, tablets, VR headsets, laptops, and computers. Your devices recognize Tap as a bluetooth keyboard and mouse, so no software is required for use – but we do recommend some, which we will detail in the guide below.
The purpose of this page is to provide you with all the necessary information you need to start tapping like a pro. Before you get started, please review this brief troubleshooting video to ensure you have the best experience with your TapXR.
2.Unboxing Your TapXR
Inside your TapXR package you will find four components;
- 1 Large TapXR Band
- 1 Small TapXR Band
- 1 TapXR Sensor
- 1 Magnetic USB-C Charging Cradle
2.1.Selecting the Fit for Your Tap Band
Try on the Small and Large TapXR wristband by sliding the opening over your wrist or slipping it over your hand like a bracelet. The TapXR band is made from durable material that is designed to be comfortable enough to be worn all day.
The band should be snug with no gaps and not shift left or right when moving your wrist or tapping your fingers. If you are between sizes, we recommend going with the small.
2.2.Assembling Your TapXR
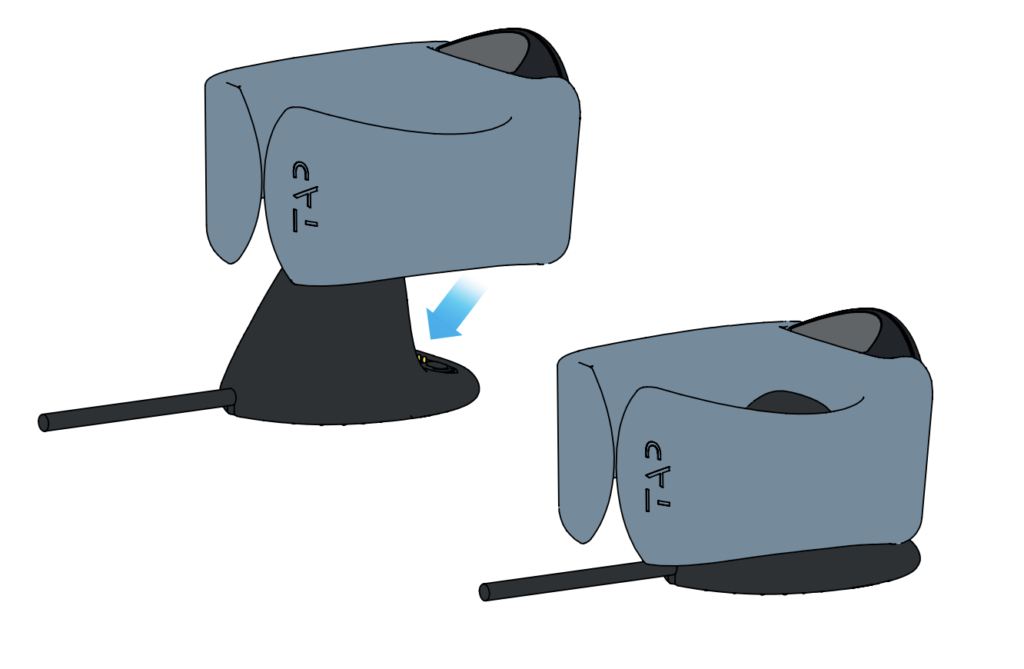
The TapXR comes in two parts; the Sensor and the wristband (Band). Once you have selected the best fit for your wristband, you can attach the XR sensor. This modular design allows you to quickly and easily swap your XR to other band colors or wrist wearables.
To assemble your XR, snap the Sensor into place by lining up the dot on the Sensor with the dot on the bottom of the band and snapping it into the cradle. If the Sensor feels loose or falls out easily, or if it does not slide forward easily, ensure the dots are aligned and try again.
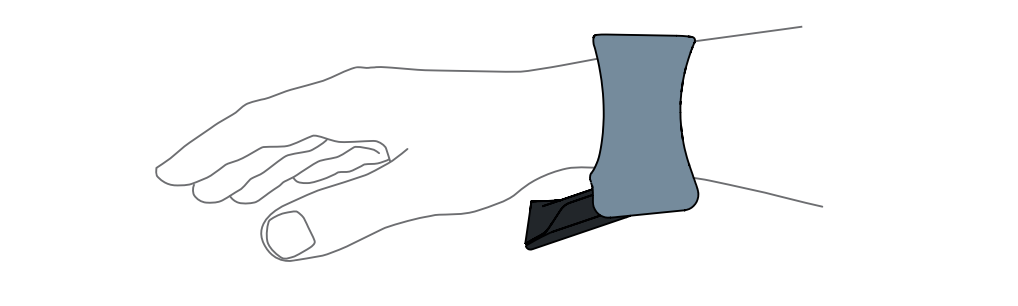
2.3.Proper Wear and Fit of the Assembled TapXR
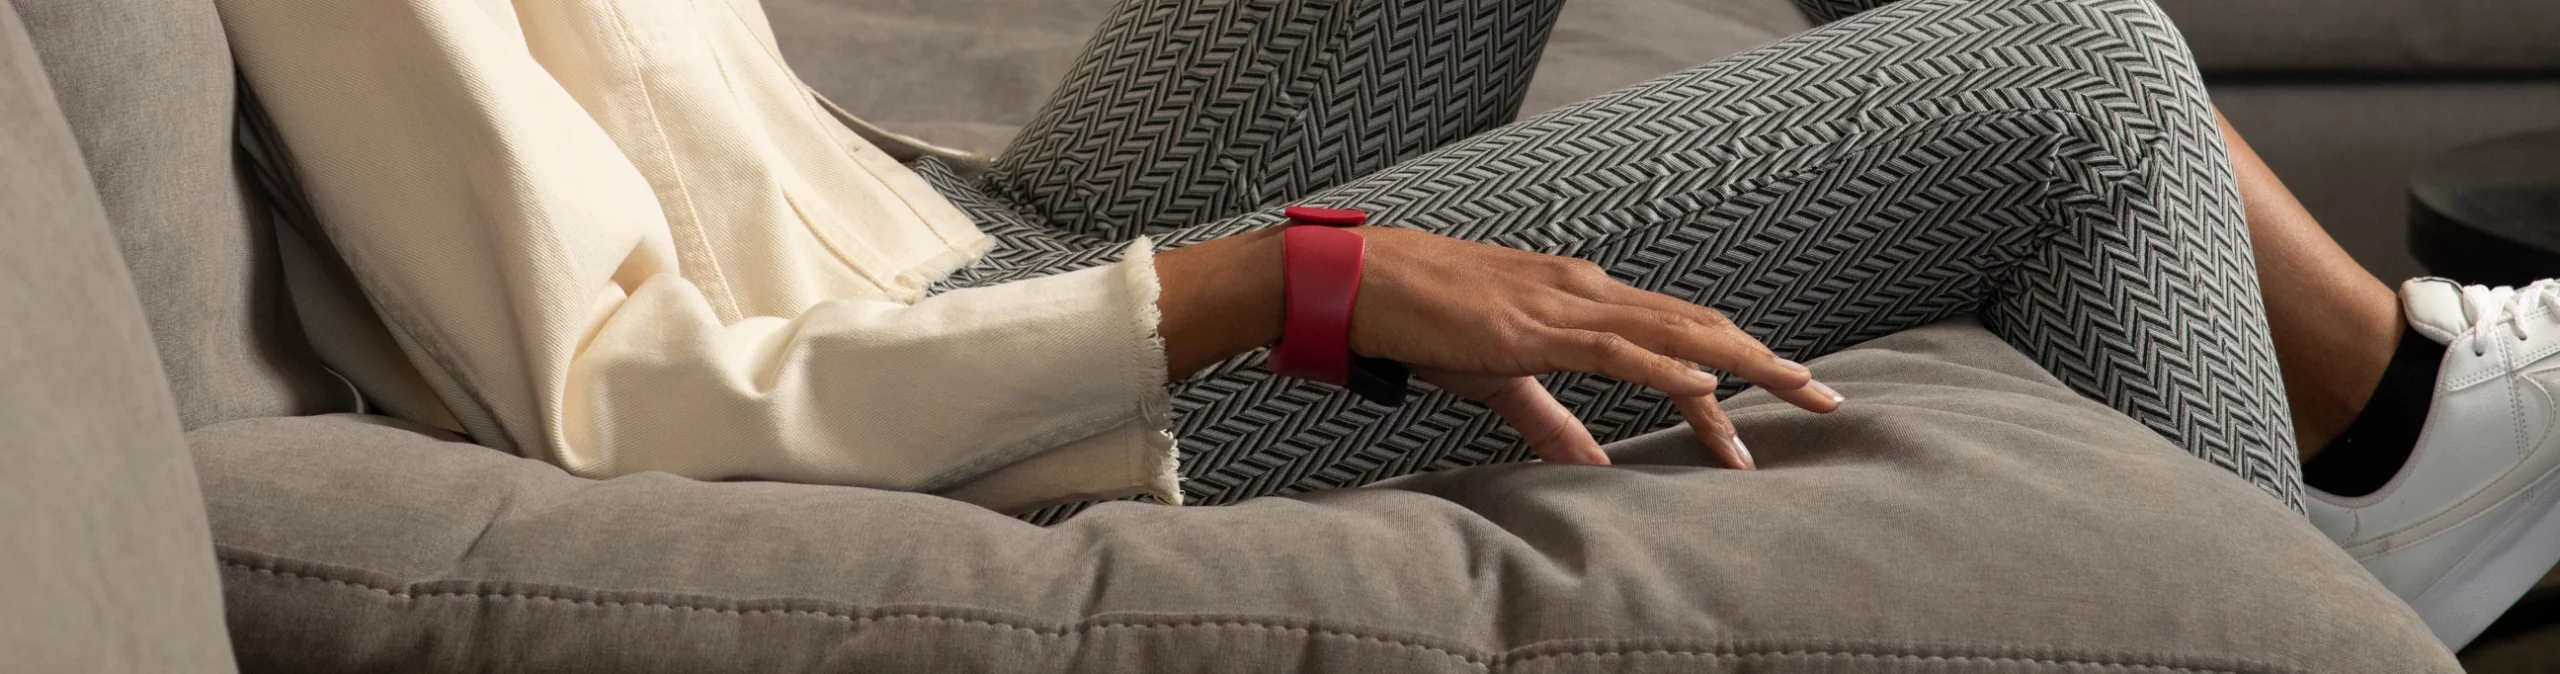
Now your Tap is fitted, assembled, and ready to go! When wearing, ensure the opening is aligned with the center of your wrist and fingers and the sensor is on the bottom of your wrist. The TapXR should be worn close to the palm joint – similar to how you would wear a watch – and not far up the forearm.
2.4.Charging Your TapXR
To charge your TapXR, place it on the charging cradle with the gold pogo pins aligned:
A gentle magnet will hold the Tap in place. When the charge begins, the LED will breathe slowly. The charger will automatically stop when the XR is full.
2.5.Turning Your TapXR ON and OFF
To turn on the XR, slide the Sensor forward towards your fingertips. Slide the Sensor back into its cradle to turn it off.
You can also turn the TapXR on and off by pressing the button on the back of the Sensor.
When the TapXR is first turned on, the LED will blink quickly, (twice per second), to indicate that it is ready for pairing. When it has been paired to a device, it will blink slowly (once per two seconds), indicating that it is paired to a device.
2.6.Understanding Your TapXR’s Haptic Feedback
Your TapXR also has haptic (vibration) feedback to provide you with more information.
- On Startup: Your Tap will vibrate 1-3 times when powering on. The number of vibrations indicates the battery level. Each buzz represents 33% of the remaining battery.
- On Power Down: When turning off your Tap it will have one vibration. This indicates the device has powered down.
- Auto Sleep: If you do not use Tap for 2 minutes, it will enter into sleep mode and vibrate once.
- Switch Mode: When entering into SWITCH mode (ooxxx), you will feel a very short vibration to indicate the mode was entered correctly. You will also feel a short vibration when exiting switch mode.
- Shift: When turning shift on (xxxoo), you will feel a very short vibration to indicate the mode was entered correctly. You will also feel a short vibration when exiting shift mode.
- Custom Mappings: When entering into your custom TapMap (switch then xoxxx), you will feel a very short vibration to indicate the map was entered correctly. You will also feel a short vibration when exiting your map.
- Multi-Tap: When performing a double or triple tap, you will feel a very short vibration to confirm that you have performed a multi-tap.
3.Download TapManager onto your Smartphone or Tablet
We strongly recommend installing the TapManager app for the best user experience. It contains brief, important tutorials, critical software updates that improve product function, and other guided materials. TapManager is available on iOS, Android, OSX and iPad OS, and we expect to launch it for all other systems very soon.
To download the app from the app store please follow this link using either an iOS or Android device: http://tapwith.us/GetTapManager or search for “TapManager” in the App Store or on Google Play. If you do not want to use TapManager, please skip to the Pairing Your Device section.
When you open TapManager for the first time, you will first create an account and then be prompted to pair your Tap.
3.1.Pair Your TapXR to Your Device Using TapManager
When using TapManager to pair your TapXR, you will be prompted to turn your XR on and hold it near your device. This prompt will only occur on your first use of the app.
You may also turn on your Tap and pair it in your device settings under Bluetooth. The XR will appear as an external keyboard device named “TAPXR_” and a series of numbers.
If you do not see your TapXR listed or it is not pairing through TapManager, ensure it is in pairing mode as indicated by the LED.
Your Tap’s LED has 3 modes: Paired, unpaired, and charging.
- Paired: Slowly blinking at 1 flash every 2 seconds
- Unpaired: Quickly blinking at 2 flashes per second
- Charging: Slowly glowing in a breathing pattern
Once paired, you will be prompted to select your tapping hand via the tutorial.
If a software update is available, you will be prompted to install it.
Lastly, you will be given some tapping tips and move through a brief tutorial. This tutorial will only appear automatically on your first use of TapManager and can be accessed again any time under the LEARN tab within TapManager.
3.2.Updating Your TapXR Using TapManager
Your TapXR will prompt you to update in 2 ways;
- During initial setup (if there is a new firmware version)
- Under the SETTINGS screen in TapManager
To update, ensure you are on a stable internet connection and your Tap battery is at least 50% full.
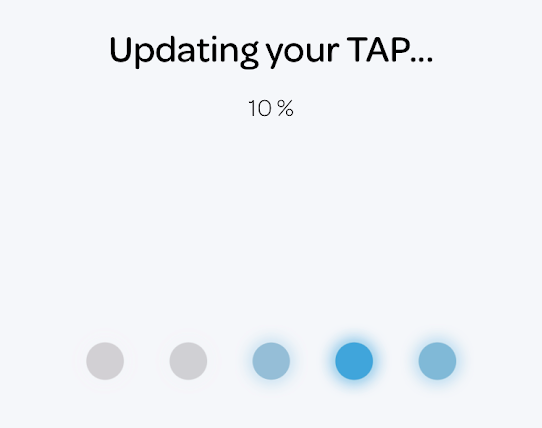
Once you begin the update, your Tap will begin to download the software. You will see the progress of this update via the percentage bar on your screen:
After completion, you will be prompted that your tap is up to date.
3.3.Adjusting Your TapXR Using TapManager
There are many additional settings within TapManager that can help you make TapXR your own! Familiarize yourself with the settings and options below:
- Vibration: Disable this setting if you do not wish to receive any haptic (vibration) feedback from your Tap.
- Auto-Correction: On by default, Auto-Correction will use your devices settings to fix errors in the things you type. You can disable it at any time.
- TapMapping: Here you can find your custom TapMap that you have installed and swap in and out of it. You can also swap in and out by tapping SWITCH (ooxxx) and the letter C (xoxxx).
- Voice-Over Mode: You can turn this on or off at anytime to enable Tap’s VoiceOver commands to work with iOS VoiceOver.
- Double Tap Timeout: Adjust how long you have to input double taps for special commands or characters.
3.4.Pairing Your TapXR Directly to Your Computer or Headset (Not Using TapManager)
Here are the steps to connect your Tap to your Mac:
- Ensure your Mac is running OSX Yosemite or above.
- Ensure your Mac supports Bluetooth 4.0+ (LMP 0x6 or above).
- Make sure the Tap is turned on and discoverable (LED blinking quickly, 2 blinks/second). If your Tap’s LED is blinking slowly, it is paired to something else and needs to be disconnected before it can be discovered.
- On your Mac, choose Apple menu > System Preferences, then click Bluetooth.
- Select the Tap in the list, then click Connect.
- Start tapping!
Here are the steps to connect your Tap to your PC:
- To connect, your Tap must be on and within range (10 feet) of your device.
- Make sure your Tap is charged and powered on.
- Make sure the Tap is in Pairing mode as indicated by the quickly blinking LED (2 blinks/second)
In Windows 8.1
- Turn on your Tap.
- Select the Start button > type Bluetooth > select Bluetooth settings from the list.
- Turn on Bluetooth > select the device > Pair.
- Select your Tap device
In Windows 10
- Turn on your Tap
- Turn on Bluetooth on your PC if it’s not on already. To do this, select the Start button, then select Settings > Devices > Bluetooth & other devices and turn on Bluetooth.
- You can also use action center to turn on Bluetooth. To do this, on the taskbar, select action center > Bluetooth.
4.Section 3: Learning and Customizing Your TapXR
The best way to start learning to tap is with TapManager, which contains a short tutorial that teaches the most common letters of the alphabet, and also a fun learning section in which you learn new letters by spelling words. It takes about 30 minutes to learn the alphabet using TapManager.
There is also a gamified learning app called TapGenius which teaches the alphabet using fun games and mnemonics. TapGenius breaks down the alphabet into eight easy to remember “tap sets” that combine mnemonic tutorials and engaging game-play for each set. It is a great way to learn in advance. There is also a version of TapGenius for blind users called TapAloud that teaches the alphabet with voice cues.
To increase tapping speed, you can use the TapAcademy app which provides speed drills and tests, and helps you rapidly improve your tapping speed.
Download them here to get started:
- TapGenius (iOS, Android) – http://tapwith.us/GetTapGenius
- TapGenius – YouTube – https://www.youtube.com/playlist?list=PLwJomqPlLNYmRW14CGkZsuqpCPzKEKDid
- TapAloud (iOS) – Low vision and blind users: http://tapwith.us/GetTapAloud
- TapManager – http://tapwith.us/GetTapManager
4.1.Using TapMapper to Customize Your Taps
Once you’re settled in, you can start creating your own TapMaps to customize your inputs and controls. This can be done with the TapMapper tool: map.tapwithus.com. Once your custom map has been created, save it to the mapping list and upload it via TapManager with a one-click download!
To make your own custom map, visit this article: https://support.tapwithus.com/hc/en-us/articles/360035469773-How-to-Use-TapMapper-to-Customize-Your-Tap
To change and activate your TapMap, select the Maps tab in the TapManager application.
Select which category your map is under or which category of map you would like to explore. You can also view the glossary of the maps in PDF by clicking the teal GLOSSARY button. Once you have found the map you want to export, simply hit the blue GET button to install it.
This installs the map onto your Tap. Your Tap will retain this map even if you disconnect from your phone and pair your Tap to another device. To swap between maps hit SWITCH (ooxxx) then the letter C (xoxxx). You will feel a short vibration when switching. You can also manually swap your maps in TapManager.
5.Section 4: Tips for Tapping
5.1.Tips for Tapping - Fit & Wearing
- Make sure the TapXR Sensor is facing forward, towards the fingers and is fully extended
- The TapXR Sensor is below the wrist and not blocked by anything such as a table ledge or sleeve
5.2.Tips for Tapping - Tapping Form
- Make sure that nothing, such as the base of your thumb, is blocking (occluding) the sensor from having a line of sight to your fingers
- Make sure that the gap in the band is centered on the back of your wrist, and that the band is worn near the hand (not up towards your forearm).
- Ensure your fingers are slightly curved and not flexed
- Relax and have fun!
5.3.Tips for Tapping - Environment
- TapXR works in darkness down to approximately 0.1 LUX, which is enough light to be able to see your hand in front of your eyes.
- While learning, it is best to start on a flat, hard surface.
6.Using the TapXR Mouse
How do I activate/exit the AirMouse mode on the Tap 2/TapXR?
Position your hand vertically (your thumb should be on top, facing up, and your pinky should be at the bottom). Point your index finger forward, keep your thumb next to your index finger so that they are both pointed in the same direction. Wait until you feel a single haptic vibration.
Please note that the AirMouse is a BETA feature. Mousing and controls will be improved with future firmware updates.
NOTE: The TapXR AirMouse requires firmware 3.3.1 or later via TapManager for iOS, iPadOS, OsX or Android. Learn how to update your firmware here.
How do I get out of AirMouse Mode?
Hold your hand horizontally, so that it is parallel to the floor. You will feel a haptic vibration when it goes back into keyboard mode. You can also put the thumb glider on a surface and move it slightly to get out of AirMouse Mode.
TapXR Airmouse Controls (BETA):
- Tap your thumb with your index finger to click
- Tap your thumb and index finger twice to double click
7.Support Lines
We want our tappers to succeed, and are here if you need any help or guidance.
Please start with our comprehensive FAQs here: support.tapwithus.com
- Email Support: [email protected]
- General Inquiries: [email protected]
- Dev specific Q&A: [email protected]
Live Chat: www.tapwithus.com, Monday – Friday, 9am – 5pm PST
(Real live humans, no robots)
Text: +1- 626-216-3654
WhatsApp: +1-626-216-3654
7.1.Online Communities
Reddit: reddit.com/r/TapWithUS
Facebook: https://www.facebook.com/tapwithus
Facebook Tappers Secret Group: https://www.facebook.com/groups/tapwithus
Facebook Devs Secret Group: https://www.facebook.com/groups/tapdevelopers
Twitter: https://twitter.com/tapwithus
Instagram: https://instagram.com/tapwith.us
LinkedIn: https://www.linkedin.com/company/10370354/
GitHub: https://github.com/tapwithus
Vimeo: https://vimeo.com/tapwithus
YouTube: https://www.youtube.com/c/tapsystems
Affiliate Program (Make $ Promoting Tap): https://www.tapwithus.com/affiliate-program/